2013 – Yearly Round Up – April

April 1April was a time for wandering around London taking shots of people on the streets. I mean they were walking about on the streets, I didn’t knock them down with my backpack first then take a shot of them on the floor… this time.

This was my first attempt at street photography. How would I do it? Go up to people and ask? Ask after the shot? No… no I just took the shot and walked away. Being my first attempt I had no idea how people would react to having their photo taken. I would think if asked then they would pose and I would loose the spontaneous ‘street’ value of the shot.

This Scottish fella, (I assume was Scottish due to the fact he was dressed Scottish, sounded Scottish and could play the bag pipes really well) was performing near Nelson Column and I managed to snap this shot of him. He is either giving someone a thumbs up or in the middle of the socially accepted hand gesture of ‘on ya bike’.

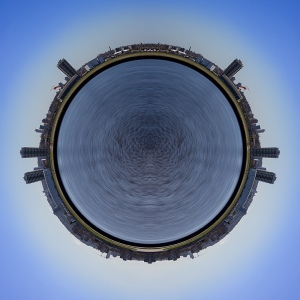
April 2 This shot was taken as a panoramic originally on the banks of the Gallions Point Marina in East London. The effect is called a small world and uses the polar coordinates filter in Photoshop to achieve. I should do more of these as they come out very well.

LITF

2013 – Yearly Round Up – March

phalicMarch turned out to be London and chucking things around bathrooms.

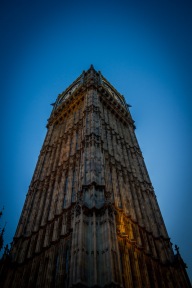
London first… specifically Westminster. Every one take a shot of Big Ben. So I thought I would to. Most shots I have seen are from across Westminster bridge so I decided to take one from a little closer. Its a bit of mad shot taken from ground level but it makes a change from the usual tourist snap.

I noticed some people around me were also pointing cameras up after mine. Either to take a similar shot or to figure out what I was doing.

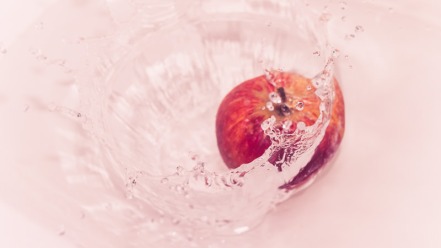
The honorable mention shot came about by me chucking stuff around in the bathroom. I filled up the basin with water half way and found an apple to use as a ‘thing to chuck’. I used the 50mm f1.8 to capture this and only took a single shot… as the resulting splash threw water all over the bathroom floor.

splash

2013 Yearly Round Up – February

And so to February…

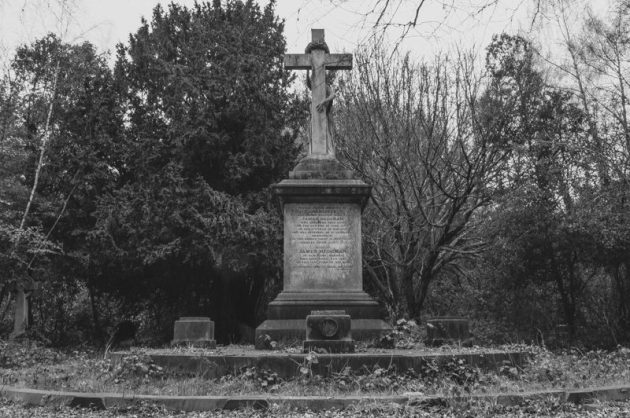
This month started out very spooky… I was visiting Barnes Graveyard. Disused and abandoned many years ago the area is in great disrepair and provided me with lots of shots of crumbling gravestones. Myself and a fellow photographer trudged through the area and right in the center was a very large grave. I recommend anyone who wants spooky shots to take a trip there.

Barnes Graveyard - 22

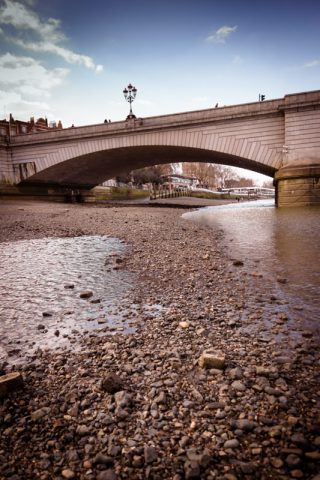
Putney Bridge - 20Soon after I was back near Barnes, this time at Putney Bridge. If you had read my GPS location that day you would have found be actually under Putney Bridge as well. I knew the tide had already gone out and I knew I have about twenty or so minutes before it came rushing back in.

Walking under the bridge was a tad slippy I was rewarded with shots of ducks, river brick-a-bract and other assorted things.. as well as what looked like a bone.

The Honorable mention photo is this one to the right. I was standing on a a spur watching the water rush back in. The way behind me had already been closed off while I took this shot. Two minutes later the area in front had submerged! I was heading for the bus by then….

LITF

2013 Yearly Round Up – January

Morning,

Jan 2This is the start of 12 posts covering each month of the past year. Two shots will be chosen (and one has already been forced on me) as best and honorable mention.

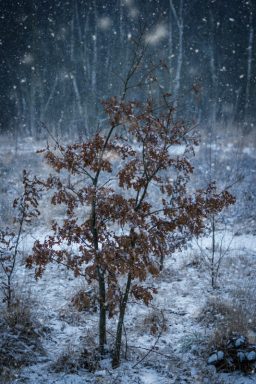
So we kick off with January with this shot of a very small tree covered in snow. For those of you who were reading this blog at the beginning of the year will remember this post You forgot to mention… where I was trying to photograph snow… while it was still snowing. Everything was covered in snow. There should have been a shot of me covered in snow…

It was in January so everything was still a bit Christmasy so I added some snow in post production. The real ‘lets cover everything’ snow was falling too fast and looked like rain. The thing that reminds me about this shot was how quiet everything was, all you could hear was the snow falling..

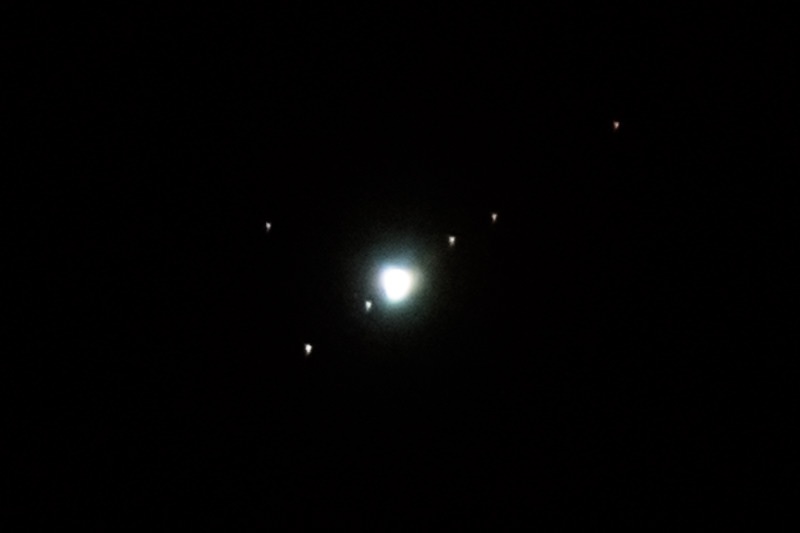
So from a snow covered Earth I turned my lens skyward for the honorable mention photo for January. I have entitled this one ‘Bloody hell really???’

The shot was taken with my 50-250mm Canon while sitting on my tripod. For those who are thinking WTF? The large blob in the center of the photo is Jupiter!

Yup, the massive and slightly gusty gas giant in our solar system. The four little blobs at 45degrees to Jupiter around it are the Galilean moons, in order from left to right Ganymede, Io, Europa and Callisto The other two blobs (middle left and top right) are the light from other stars.

This shot has the honorable mention slot as it was a shock that just a ground based camera can look that far… must try a large telescope one day.

Jan 1

LITF

Slow Time

Slow Time 1Afternoon,

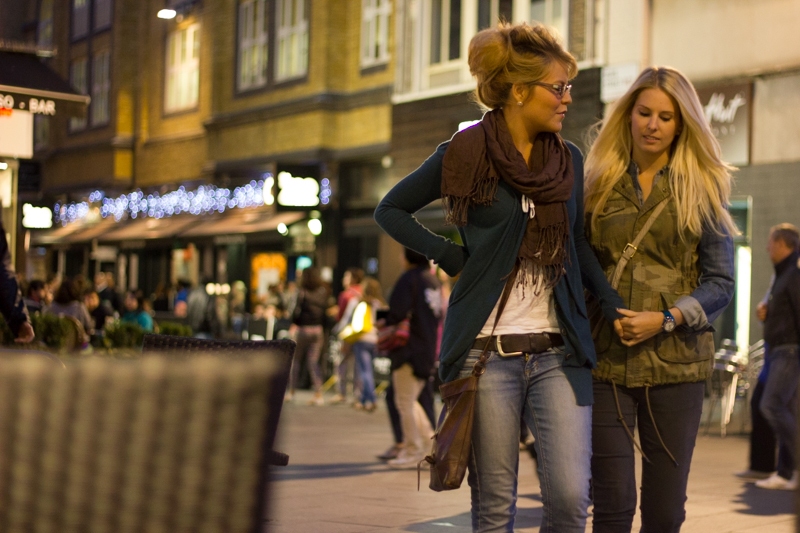
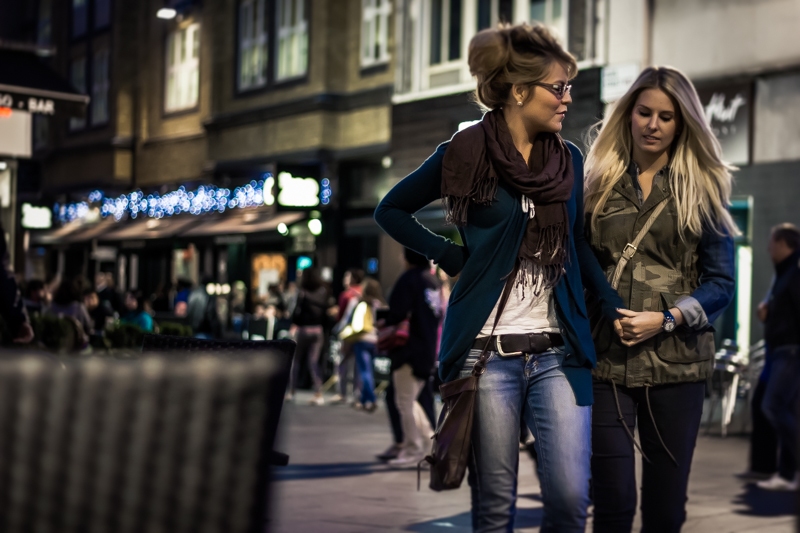
I recently posted on Flickr a shot I took a while back in Leicester Square in London. I and another photographer had been walking around Camden looking for inspiration and found our way to the west end to finish off the walk.

Sitting at one of the bars I noticed these ladies walking to wards me. I rested my Canon on the table in front of me and fired off this shot. It was taken with my 50mm f1.8 lens. A chanced shot considering the auto focus could have settled on the chair in front but it paid off quite well.

A couple of things bothered me about this shot:

  • The bokeh at the back left was nice but a little two strong and draws the eye away from the couple.
  • There was a strong yellow cast to the scene which I wanted to take out.
  • Nothing I could do about the chair in front of the shot.
  • The figure on the extreme right is also distracting.
Slow Time 2

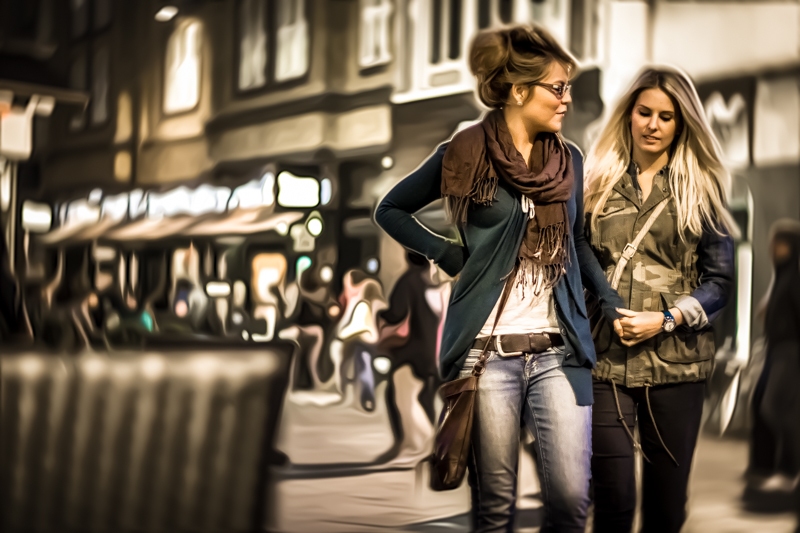
After throwing the shot into Lightroom I dialed back the yellow and deepened the blacks and upped the blues to add a little contrast. The image was softened slightly and an adjustment brush was used over the main couple to sharpen them up and bring them more forward than the rest of the scene.

Something still wasn’t right. They looked deep in conversation when they sat down. They seemed to be oblivious to everything around them. As if for them, time had slowed down. I wanted to reflect that in the shot.

I’m not much of a philosopher but you get the idea…mask

Throwing the whole thing into Photoshop I created two copies of the frame and created a mask of the couple and copied that to the other frame copy. Named them Radial Blur and Oil Paint. I used the oil paint filter ten times to blur and merge everything behind the couple, this blurred out the bokeh and softened up the chair in front, doing this so much darkens the image so I had to apply an exposure layer over the top before saving. The radial blur was applied to the other copy of the image with only about 5 points of spin dialed in. The masking left the couple untouched by the effects.


Slow Time 3

This is the final image, I used Lightroom to blur the edges and bring some more detail back to the couple and the whole frame was warmed up a little, it looked too cold.

LITF

Ooohh that’s so much better!!

Not what you are thinking!!

So there I was, coming back from the bar with a bottle and a can of Becks and a small shot of sambuca, when up bounced a pretty waitress. ‘Would you like a cupcake?’ I declined, explaining my hands were full. ‘Open your mouth!’ I was told. Seconds later I was handing over the drinks while trying desperately not to drop cupcake and dribble over my friends.

I was back at Madam Jo Jo’s for the final show this year of Cabaret Roulette. For the past few months I have been allowed to shoot photos there to gain more experience in low light conditions. In the performances at Jo Jo’s I can expect ever changing low light conditions!

In the last post I mentioned my purchase of a Sigma 70-200mm f2.8 lens. This was to be the first field test and I choose the First Birthday Revue of Cabaret Roulette as the bench mark.

After a pint of ale in the Bear outside Leicester Square tube station, we arrived at Madam Jo Jo’s to find a long queue waiting outside. We choose our seats and I spoke to the producer concerning where I could shoot from. The usual photographers area was taken by the official photographer and videographer. So this time I choose the short walkway from the seating area to the stage. I thought this would be a good idea which was dashed by the two bars affixed to the ceiling and hand rail getting in the way.

Looking around I had the idea of sitting on the stairs from the seating area to the pit. This provided around 80% coverage of the stage area, above every ones heads in the pit and was not obscured by any stage lighting from the front. It pays to look around a venue to find a sweet spot but I was asked to be mindful of some performers moving from the pit to the stage.

So getting ready with the Canon I took a quick test shot. The ISO was 3200?? Eh.. Oh hang on lets have a look at the settings. Ok yeah I need to drop it down from f5.6 to f2.8, ah there we go! The lens, although much heavier than the Canon it performed so much better in a low light situations.

I was achieving ISO ranges beginning at 800 rather that starting at 3200. Lower ISO, faster shutter speeds so I had more photos to choose from in post production. The Ultra Sonic Motor is  really fast and allowed me to capture shots I might have normally missed as well.

One thing though. Its bloody massive. It will not fit in my Slingshot bag, well it will but it will not allow anything else. The lens and the camera combined will fit in the backpack so that means I will be knocking people down escalators again!

All in all I am very happy with the lens and look forward to using it in anger again.

Thanks to Vivacity Bliss for allowing me to shoot there!

LITF

Waited all day…

We have all been there. We purchase something online. We get up early. We wait.

At some point during the day you will think “If I go to the toilet, then the universal ‘piss you off  o’meter’ will mean the delivery van will turn up at the wrong moment”. But not last week, I was been up at 7am, knowing that my delivery was in transit. I found out very late in the day from Amazon that it would arrive sometime before 9PM. Well that’s dedication for you.

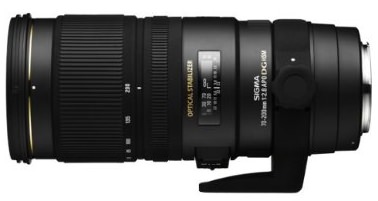
I am now the owner of a Sigma 70-200mm f2.8 EX DG OS HSM lens for my Canon. I thought I would take a step up in lens quality and purchase something with a fixed aperture and zoom.

First impressions:

  • That’s a big box…
  • How heavy is this??
  • IT COMES IN ITS OWN CASE???

Second impressions:

For something the was billed as second hand :-

  • The item may come repackaged. It wasn’t.
  • Front of the housing has minor cosmetic imperfection. It hasn’t.
  • Minor cosmetic imperfection on the top or sides of the item. Not that I can see.
  • Minor cosmetic imperfection on the bottom or back of the item. Nope.

The original Sigma box has all of the above but not the lens it looks brand new!

Third impressions:

  • Damn this is heavy, it feels three times the weight of the Canon 50-250 and its twice the length!
  • The lens hood makes this even longer!
  • The HSM is FASSSSST!! Very impressed with that.
  • Chromatic Aberration is near zero. More noticeable on the Canon but low to nothing on the Sigma.
  • Tripod collar… because it is heavy.
sigma

Fourth Impressions:

  • The lens will not fit in my Slingshot bag. It can fit the length of it but I then cannot fit the camera.
  • The backpack will have to become the default from now on. That at least can hold the lens while attached to the camera. I had to rearrange the padding walls a bit to accommodate the other lenses.

Conclusion:

  • I need to plan ahead from now on to choose which lens would be the best to take. The backpack is OK but tends to knock people down escalators on the London Underground, it holds everything I need but I may not need to take everything with me.
  • I will not be selling the Canon 50-250. It’s good to have a back up and shoot dependent.
  • The position of the focus ring is where the zoom ring is on the Canon, I am going to have to get used to the slight distance change for the zooming.

I will be field testing this next Wednesday so I will be blogging about how it performed after that.

LITF

Let there be light…

.. and it was so.

OK so I bought some lights from Amazon. Not quite the biblical reference some were looking for but hey its just a preamble.

The other day I was on the look out for some studio soft boxes to help with an upcoming shoot. I have worked with soft-boxes while doing head shots but have never owned my own.

So after a quick browse on Amazon I bought these BPS 2*125W Photography studio softbox set Continuous lighting Kit soft light kit + UK Plug + Free carrybag . The arrived before the allotted delivery date so arriving home I opened the massive box and pulled out the free carry bag.

The carry bag is exactly that. Its a carry bag and it was free. I suspect it comes with the kit anyway as boxing up the rest of the kit without it may have been a chore. It is claimed to be water resistant, not that I would go swimming with it but handy none the less. The zip did get stuck a few times as there is an inner lining along the zipper, just got to be careful with that or it might break easy.

Opening two longs boxes revealed two standard light stands. I noticed a welcome addition of a piece of plastic covering the end of the stand where the soft-box head would go. This would stop the screw thread from ripping though things in transit. I will be keeping them in the box anyway.

Next were the soft-boxes them selves, wrapped tightly in two separate bags they unfolded easily and were held in place when the central locking circle clipped around the bulb socket. One criticism would be that the power cable was direct to the soft-box and not via a socket. If the wire were to be damaged then the whole unit is worthless.

The covers for the front of the soft-boxes came in a small sealed packet. Then unfolded and were fastened to the box with Velcro strips on each side.

Lastly the two large boxes were obviously the 125w bulbs. They are kept in polystyrene holders so there is no chance of them smashing against anything. They screwed into the sockets easily. I noticed the end of the bulbs were fairly close to the edge of the soft-box.

Quick tip! Put the covers on first before thinking ‘I wonder how bright this is?’ and burning your retina.

Blinking a few times I attached the covers and found the tip of the bulb would be touching the cover. I don’t like fire hazards so I will have to keep an eye on this. If the soft-box were tilted down a touch then gravity would take over and the danger of my burning in a fire based plastic death was lessened.

Looking around the kitchen I opened the fridge and pulled out a bottle of beer, put a black background and set about lighting the scene with my new soft-boxes. I was using my Canon 50mm f1.8 at f1.8 and without the lights the ISO went mad and jumped to 3200 immediately. A quick flick of two switches and I was delighted to see the ISO calm down to a much better setting of 100.

I fired off a few shots and noticed I could see the bulbs through the soft-boxes in the reflection of the glass bottle. Sacrificing the retina again I could see there is a central hot spot of light from both of these units. In the future I may use some other material to act as covers.

I packed away the kit and thought about how I will arrange the boxes back into the bag. The two light stand boxes go on either side of the bag, the two boxes for the bulbs in the center between the light stand boxes. they wedge in tight, and the two soft-box bags on top of each light stand box. They fit very snug and have little room to slide about.

While editing the shot I sat back and drank the beer, thinking that a kitchen may be too small to set up a couple of soft-boxes. But hey the photo came out well, can you see the soft-boxes? Yeah I know, a little too close!

LITF

Ram Drive

I haven’t created a Ram Drive for a very long time. Years ago I dabbled in creating a ram drive but then the available ram to a consumer level pc was around 512mb – 1gig. Ram was the virtue of the privileged. RamDisks at that time would only be used to speed up browser cache directories.

This week I have been experimenting with a ram disk created by DataRam. Their freeware version allows the use of a 4 gig ram drive. My current setup has 16gig so giving up 4gig was not a heavy decision to make at all. Only Photoshop uses the most of the memory and the odd jaunt around the lands of Skyrim plays just as well with 11gig as opposed to 16.

The Ram Drive appears as a normal drive and you can change its drive letter using Computer Management. I have changed mine to R: short for RamDrive of course.

This opened up a number of options:-

  • The first was to tell Photoshop that the RamDrive was available to use for a scratch disk. This had a marked difference, everything seemed much faster.
  • I then set Firefox cache folder to the RamDrive too, this would drastically minimize the amount of files written to the solid state drive and extend its life.
  • User variables as well as Temp: and Tmp: were redirected to the RamDrive as well.
  • I use the archive program 7Zip which allows you to change its working directory to where ever you like. This was changed to the RamDrive too.

This means the only thing that the SSD is doing is being a fast boot drive with quick loading of programs.

Hmmm… So there is one other program I see that writes a lot of files to the solid state drive… it is the Lightroom preview files. If, like me you have 5000 of them then having them on the RamDisk makes sense.

But this would also mean the catalog files need to be copied to the RamDrive as well. Of course if the power to the computer fails then the data is lost.

Looking through the documentation of the RamDrive I saw that it could save an image when the computer shuts down, it will also save an image file after a set number of seconds. Mine is set to 300 seconds (five minutes). This image can also be read back at boot up. This image file is one large file rather than 5000 preview files. I use Microsoft Synctoy before I switch off the computer so the catalog files are copied down to the data drives on a regular basis anyway.

Once the catalog files were copied up and Lightroom launched, the preview files virtually flew into view. It was so much faster!

To give a comparison, my solid state drive is rated at 500mb/s for reading and writing. The RamDrive stomped that into the floor and demanded its lunch money by reporting a blistering 5596mb/s read and 7917mb/s…

Now to look at some ram boards…

ramdriveLITF

Big ass prints..

No, this is not a post about taking shots of massive donkeys..

I found a place local that could print out an A3 sized print. Why not I thought. I phoned them up and asked under which format they would like the files to be. I was told A3 would need to be 300dpi and in PDF form.

Excellent, so selecting a few shots to test out I headed out to the printers. Handing over the USB device with the files I was taken to the back to select which shots I wanted. I had created two versions of each shot. One set were created by Photoshop and the other by printing to CutePDF’s printer object.

Both sets were around the same size so I opted for the Photoshop labeled files. A couple of minutes later I had my three shots on decent A3 paper. I was a little disappointed with one as it was a bit washed out and the colours didn’t pop as much as I thought it would. Maybe I needed to use glossy paper next time and brighten it up a little. The others looked superb!

I was told that my choice of RGB was a poor one. I should have gone for CMYK instead. This has been noted and I will try again with another selection of shots.

Conclusions:

  • Big ass prints really make your shots come alive.
  • Use CMYK colour space from now on for prints.
  • Order glossy paper next time.
  • Order more!!

LITF